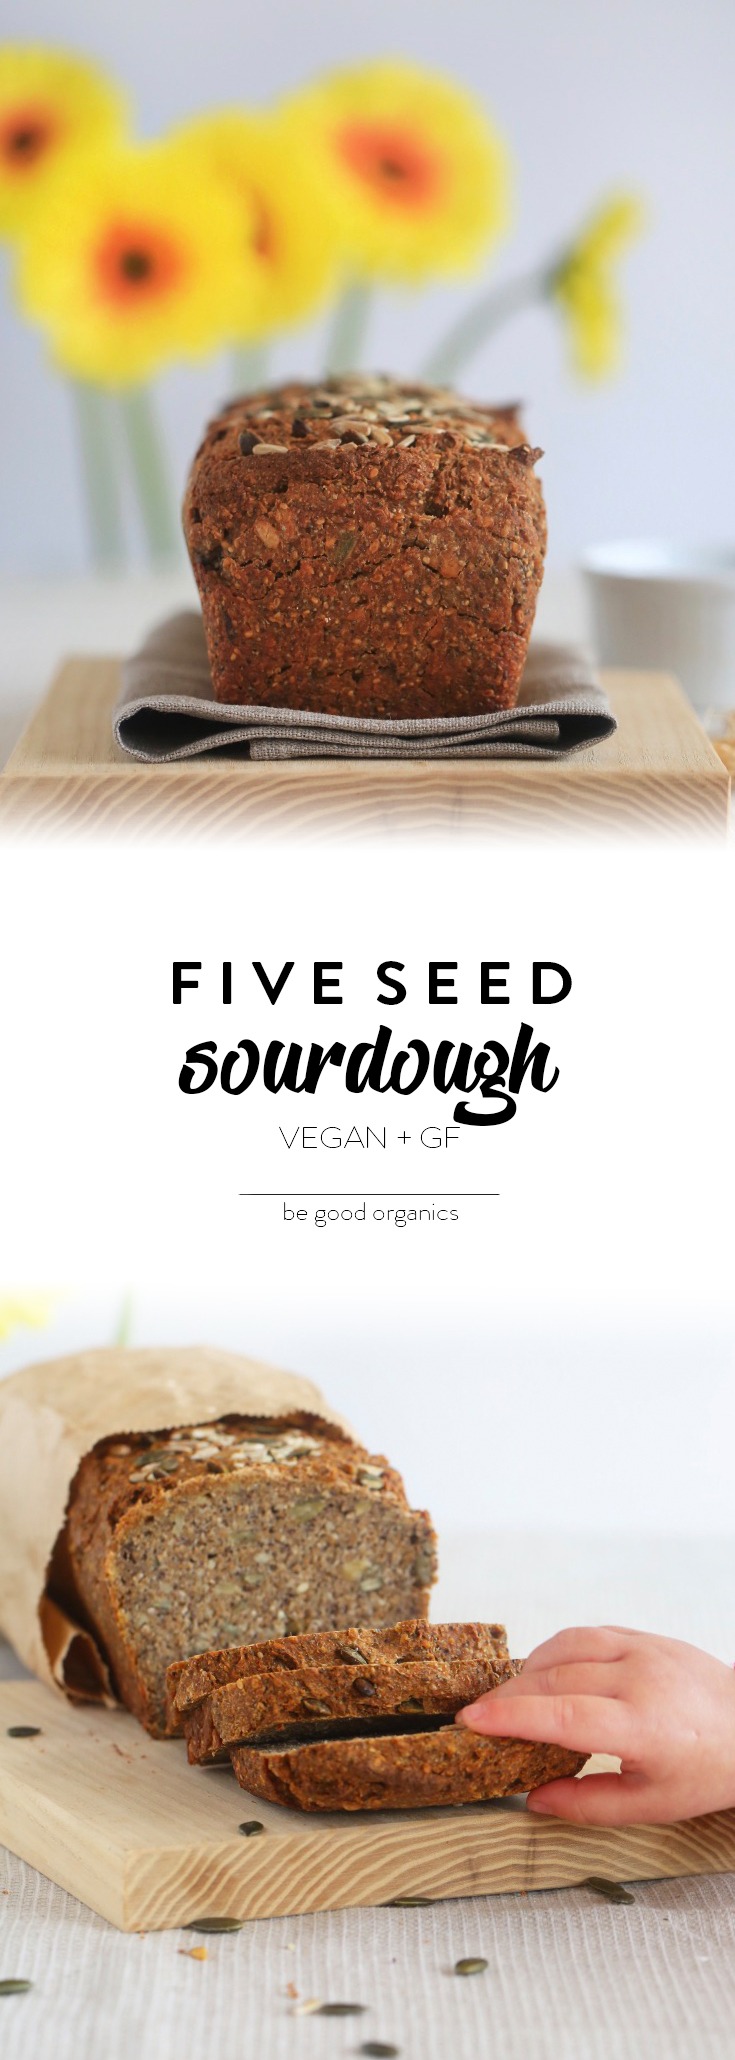
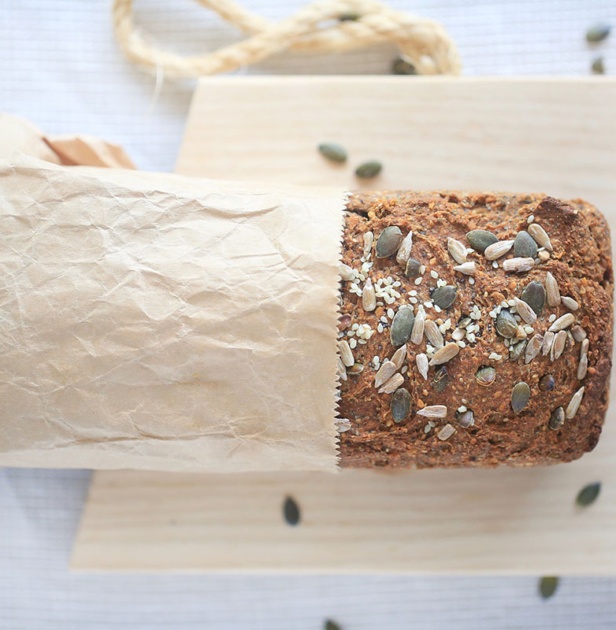
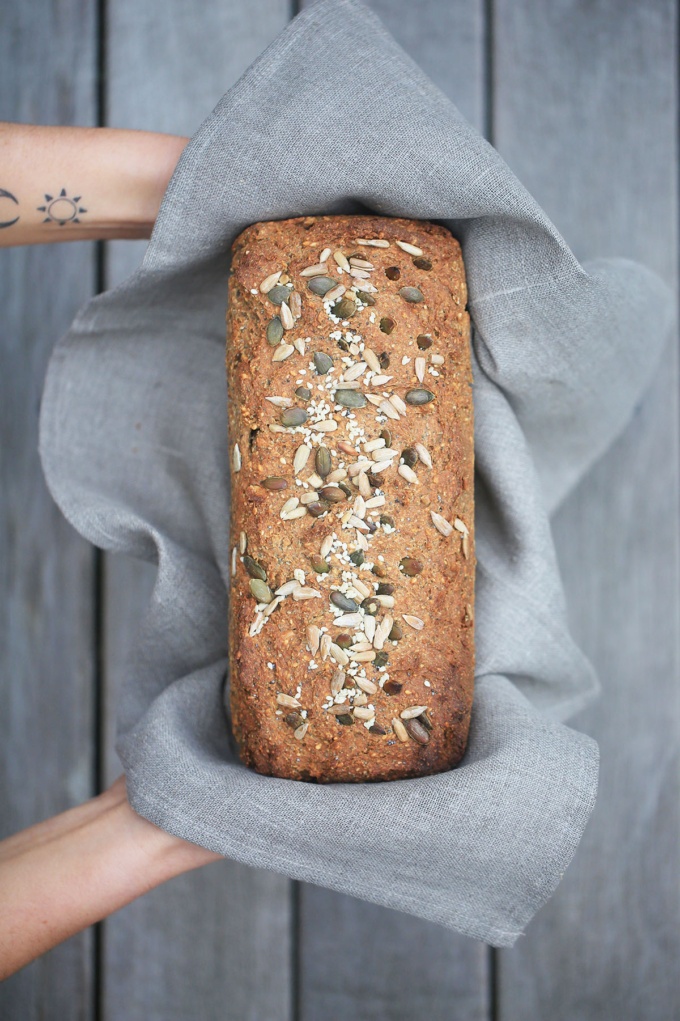
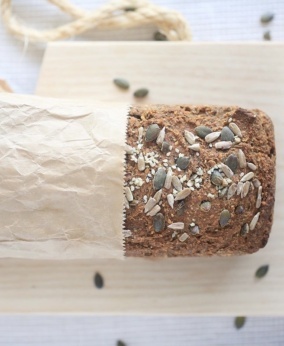
So excited for you to try this week’s recipe, an absolutely delicious Five Seed Sourdough. If you’ve never tried making your own homemade bread before, or sourdough for that matter, you are in for a treat. This recipe is super easy, requires only a handful of ingredients, is packed with healthy polyunsaturated fats and omegas from the super seed blend, and there’s no fancy bread maker required. You don’t even need to knead the dough, or roll it out on a floured board leaving a small dust cloud in your wake. Just a food processor, a plain old bread tin, and an oven, and this delicious homemade fermented loaf will be yours.

Store vs ‘Real’ Bread
I personally held off making bread for years. Seemed much too ominous, all that proving, fermenting, kneading, getting temperatures just right, then baking without it flopping in the middle or over cooking around the edges. Plus, it seemed so much easier to purchase from the store when bread is so readily available. That is until I came to realise the difference between store bread and “real” bread. The latter being that which is made with just a few simple ingredients, no eggs, thickeners, preservatives, or refined bleached flours required. Real bread that tastes amazing, is a filling and nutritious meal in itself, and is beautifully macronutrient balanced with plenty of protein and healthy fats, alongside its low GI, energy sustaining and vitamin rich complex carbohydrates.
We tried a lot of bread whilst we were in Europe recently, and oh my do the Baltic and Scandinavian nations do their bread well. Beautiful dense rye breads, filled with hemp and pumpkin seeds, and flavoured with dollops of molasses and traditionally brewed beer. The flavours were incredible, the textures so moist and almost chewy, and the experience simply divine. We ate bread like this three times a day for almost a month, and our digestion never felt better.
So when we got back, I knew I had to create something equally delicious for the blog, so you could enjoy this gorgeous bread at home too. After a number of trials, this delicious Five Seed Sourdough is my final and favourite version. I’ve made one of these loaves every third day the past few weeks, and can’t get enough of it. It lasts beautifully in the cupboard for up to five days, and equally slices perfectly (no crumbly bits) to be stored in the freezer. Although truth be told, it’s never made it to our freezer in time!
Once you’ve tried making your own bread, there truly is nothing better than the delicious warming smells of a home baked loaf wafting out of your oven. You’ll find this recipe can easily fit into your busy week too, with only an evening needed to prep (15 minutes), then a few days later a short burst in the oven and you’re done.
Top your sourdough off with…
I hope you give this gorgeous loaf a go, and would love to hear about your bread-making experience!

Ingredients
Sourdough starter
- ½ c rye flour (or brown rice flour)
- ½ c warm water (or ⅔ c for brown rice version)
Sourdough bread
- 3 c rye flour (or GF blend see notes)
- ¼ c pumpkin seeds
- ¼ c sunflower seeds
- 2 tbsp sesame seeds
- 2 tbsp chia seeds
- 2 tbsp hemp seeds
- 1 tsp sea salt
- 1 ½ c warm water
- 2 tbsp olive oil
Instructions
Sourdough starter
- Mix ¼ cup of the flour with ¼ cup of the warm water in a glass jar, put the lid on, and leave in a warm place overnight. If you're doing the gluten free brown rice version, use ⅓ cup water.
- On day 2, "feed" the starter by stirring in the other ¼ cup flour and ¼ cup warm water (⅓ cup for GF brown rice version) , put the lid on, and leave in a warm place overnight.
- On day 3 – you should see bubbles. If so, you're ready to move to the pre-bake day steps below. If there are no bubbles (especially if you're in a cooler climate), feed again by adding another ¼ cup flour and ¼ cup warm water (or ⅓ c for brown rice) each day until it's bubbling.
Sourdough bread (pre-bake day)
- Place all bread ingredients in a bowl along with your starter (you can keep 1/2 cup of your starter in the jar and save for another loaf if you want – see below). Mix to a thick dough. If it's too thick, add a little extra water, if too runny, add a little extra flour. If you're using your own starter, use 1 cup of your starter with the remaining bread ingredients.
- Pour your dough into a lightly greased or lined tin, spread it out gently, sprinkle the middle with extra seeds, then cover with a damp tea towel and leave in warm place overnight for its final rise.
Bake day
- Preheat your oven to 170°C (335°F) fan bake, place your loaf in the middle of the oven and bake for 50-60 minutes until a skewer comes out dry. Remove and let cool for at least 15 minutes before slicing.
Leftover starter
- If you want to make this loaf again, keep ½ cup of your starter in the jar.
- If you want to make bread again in the next 1-2 days: Feed it with 1 tablespoon flour + 1 tablespoon warm water each day, leaving it in a warm place overnight with the lid on, until you're ready to make your next loaf. Then go to the pre-bake day step.
- If you don't want to make bread for a few days: Put it in the fridge to "pause" it for up to 2 weeks. When you want to bake again, take it out of the fridge, feed it with 1 tablespoon flour + 1 tablespoon warm water, and leave it in a warm place overnight with the lid on to restart it. Then go to the pre-bake day step.
Recipe Notes
- Gluten free: Use brown rice flour for your starter. For your main loaf, I recommend using a ⅓ : ⅓ : ⅓ blend of buckwheat, brown rice, tapioca flour (1 cup of each). You can also try with 100% brown rice flour too, or a 50:50 blend of buckwheat flour and brown rice flour plus 3 tsp guar gum. But the brown rice, buckwheat, tapioca is my favourite.
- This bread is naturally wheat free and low in gluten, thanks to the use of organic whole grain rye flour. Rye is a lovely grain which is much better digested than refined and bleached wheat flour. I highly recommend it.
- Note that a lot of factors can affect the exact results of your bread, so read through the below notes before getting started.
- The sourdough process can take anywhere between two and four days, depending on your climate (colder climates take longer).
- The cook time might vary slightly, depending on your oven – you can check the loaf with a skewer (put it in the middle of the loaf and see if it comes out dry).
- In contrast, if your oven runs hot, be sure to place your bread in the middle of the oven to make sure it cooks through without getting overly browned and crispy on top.
- Once you get in the groove of making this, it’s actually a really labour-light process. Simply mix your starter and leave on the bench overnight, add a bit more flour and water the next day, the remainder the following, then the next morning bake. Done. Delicious.
- If you don’t want to wait the 2-3 days using the sourdough method, you can also make a quick yeast-based loaf with this recipe. Skip the sourdough starter steps, and instead just mix all ingredients together with 2 tsp of dried active yeast and 2 tbsp coconut nectar, pour into the loaf tin and leave to rise for 2 hours in a warm place, then bake as per the above. Although the sourdough version does provide the benefits of the loaf being fermented, which is wonderful for your gut bacteria and immune health.
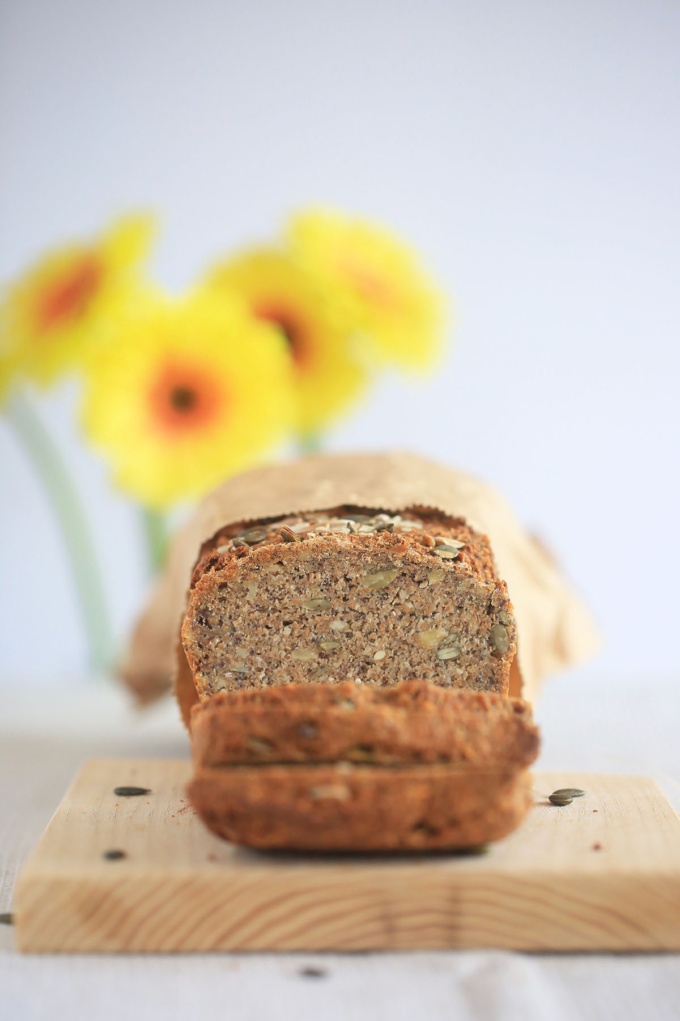
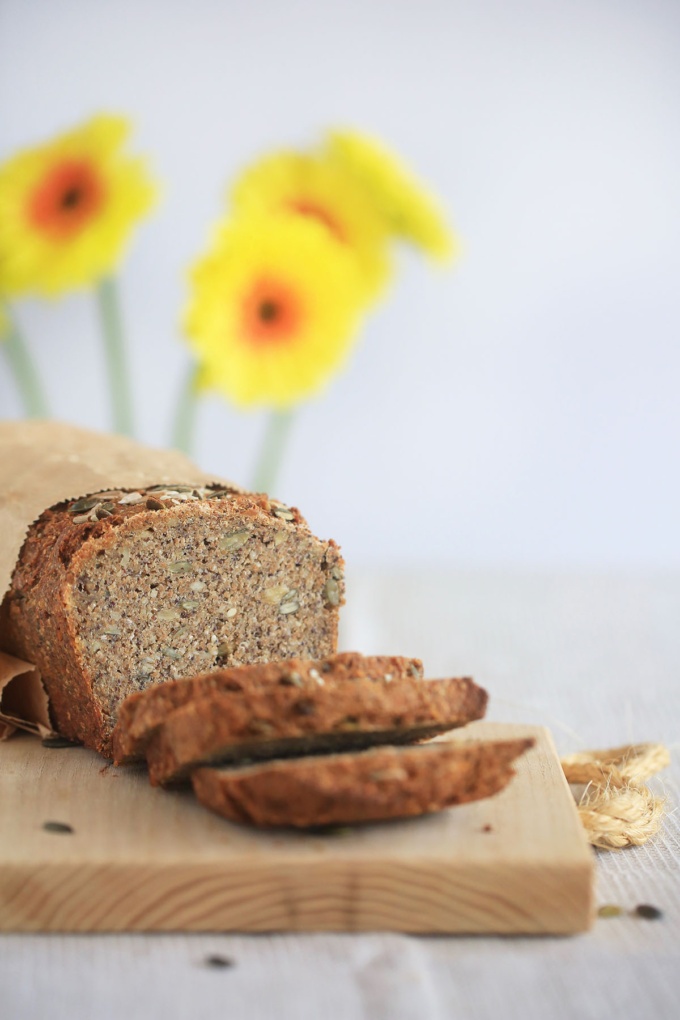
- Do note that this loaf isn’t high and fluffy if you follow the natural fermentation method – rather, it’s hearty, thick and dense – think Danish rye bread.
- The dough is quite sticky – don’t worry, this will create a lovely moist loaf.
- Wrap in a tea towel once cool and keep in the cupboard for up to five days. It’s also brilliant toasted, spread with my Turmeric Butter or Basil & Kale Pesto.
- It also freezes really well – simply slice to your desired thickness then place in a bag in the freezer and remove each slice as you need.
- If you don’t have all the seeds above, simply replace with the ones you have available to make up the same total measure. The chia seeds are great substituted with flaxseeds, hemp can be replaced with poppy.
- For a nice variation, try adding 2 tbsp of dried herbs or 4 tbsp of fresh chopped herbs to your mix – rosemary, thyme and oregano are all lovely.
- I’ve used a silicon loaf tin for this loaf (measuring 22 by 9 cms, and 5.5 cm deep). It makes clean-up a breeze, and the loaf pops out super easily with no sticking or remnants – definitely worth acquiring if you decide to make this bread regularly. Just make sure you buy a quality brand so that it’s able to cope with high temperatures safely.
- Natural bread making gives natural and varied results. Embrace it and ENJOY the process!! Happy bread making, and any comments or questions feel free to ask me below.
Did You Make This?
Tag @begoodorganics
I can’t wait to see your creations!