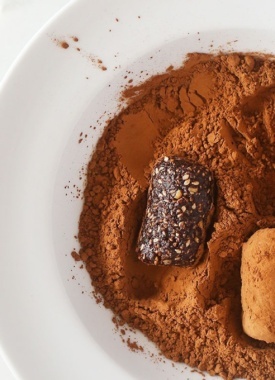
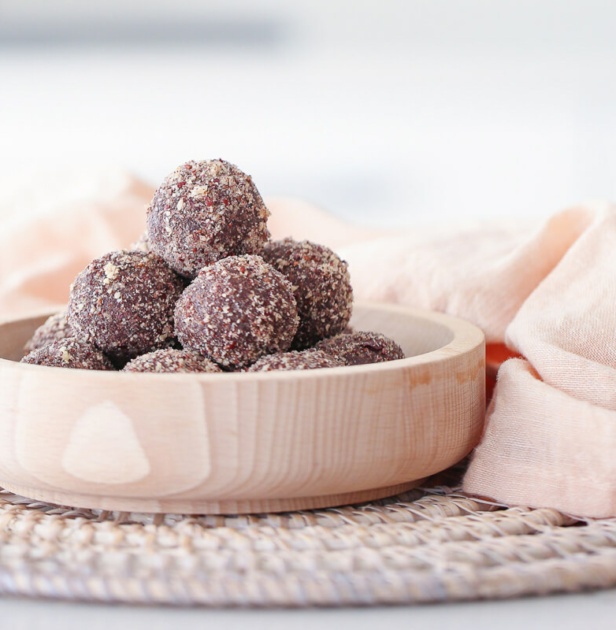
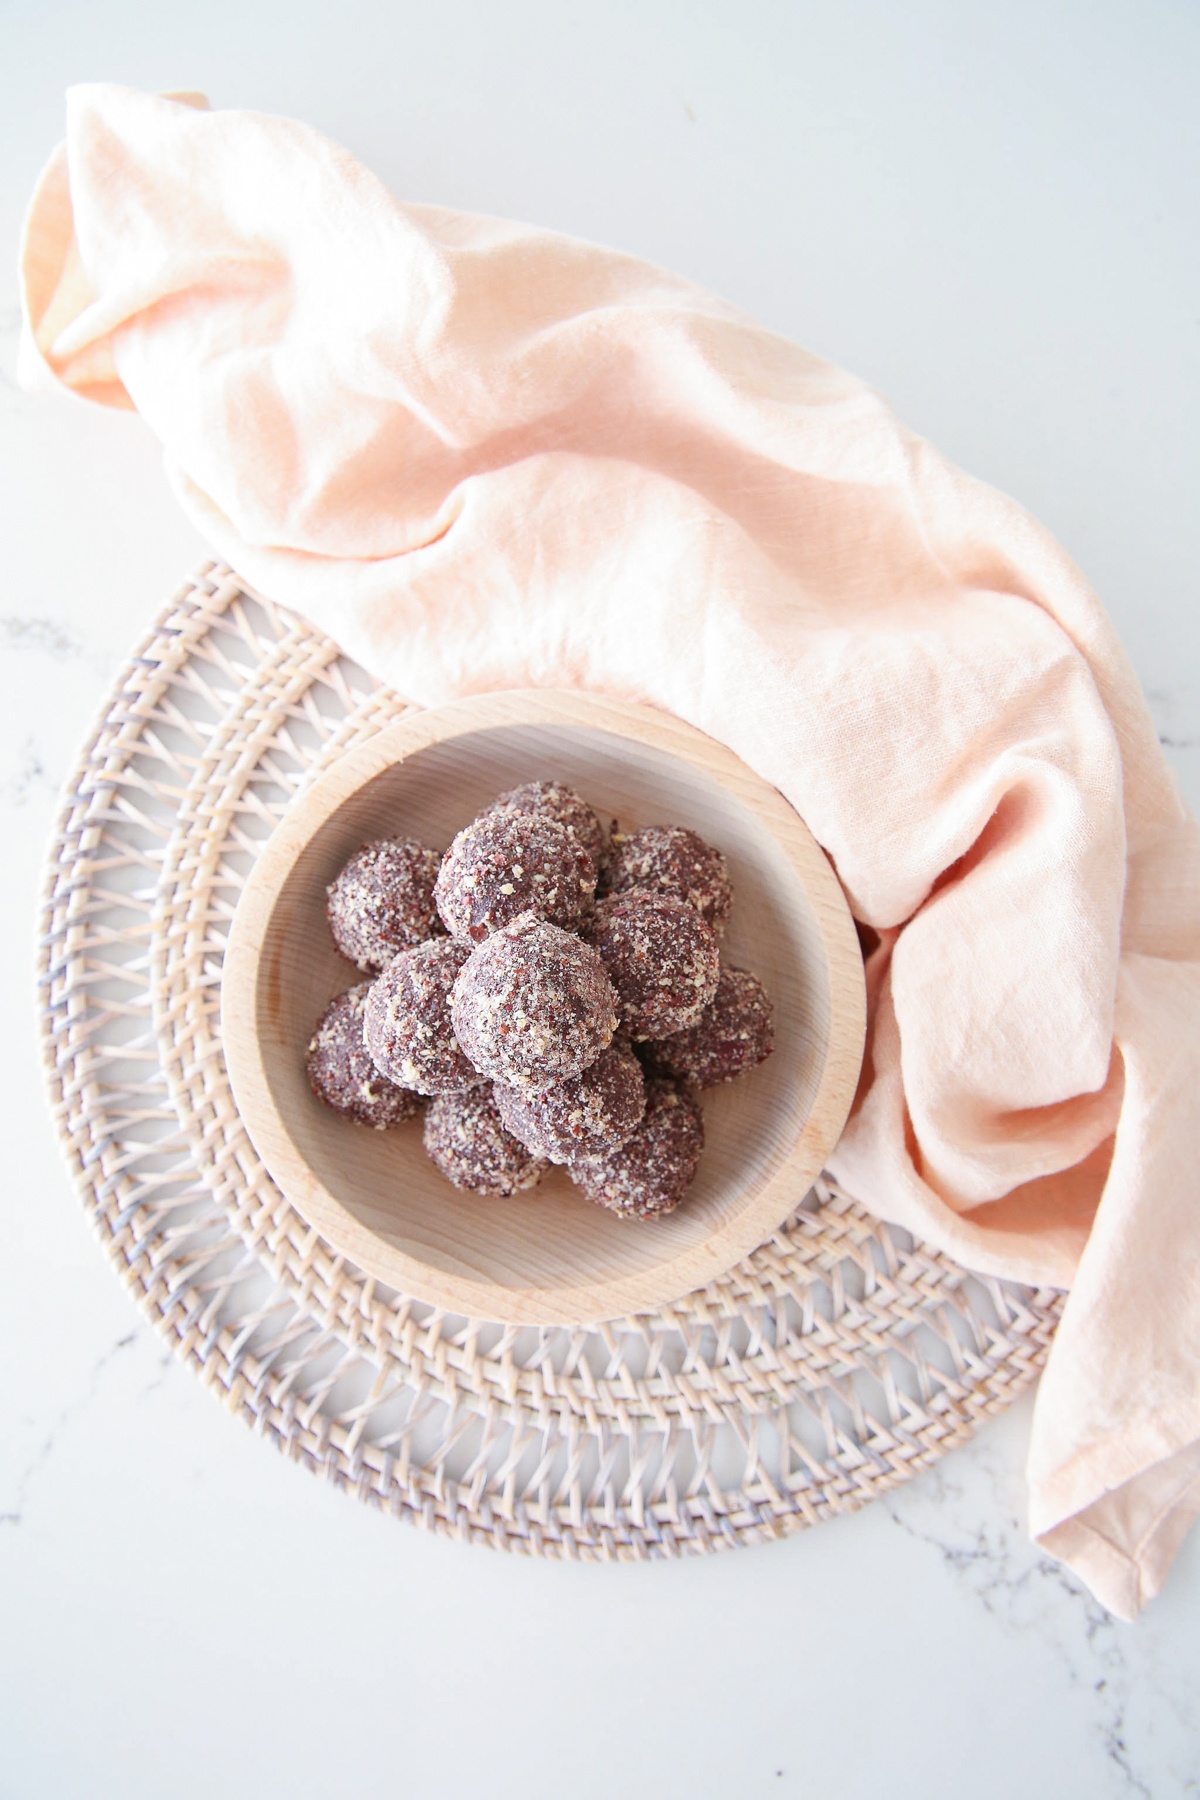
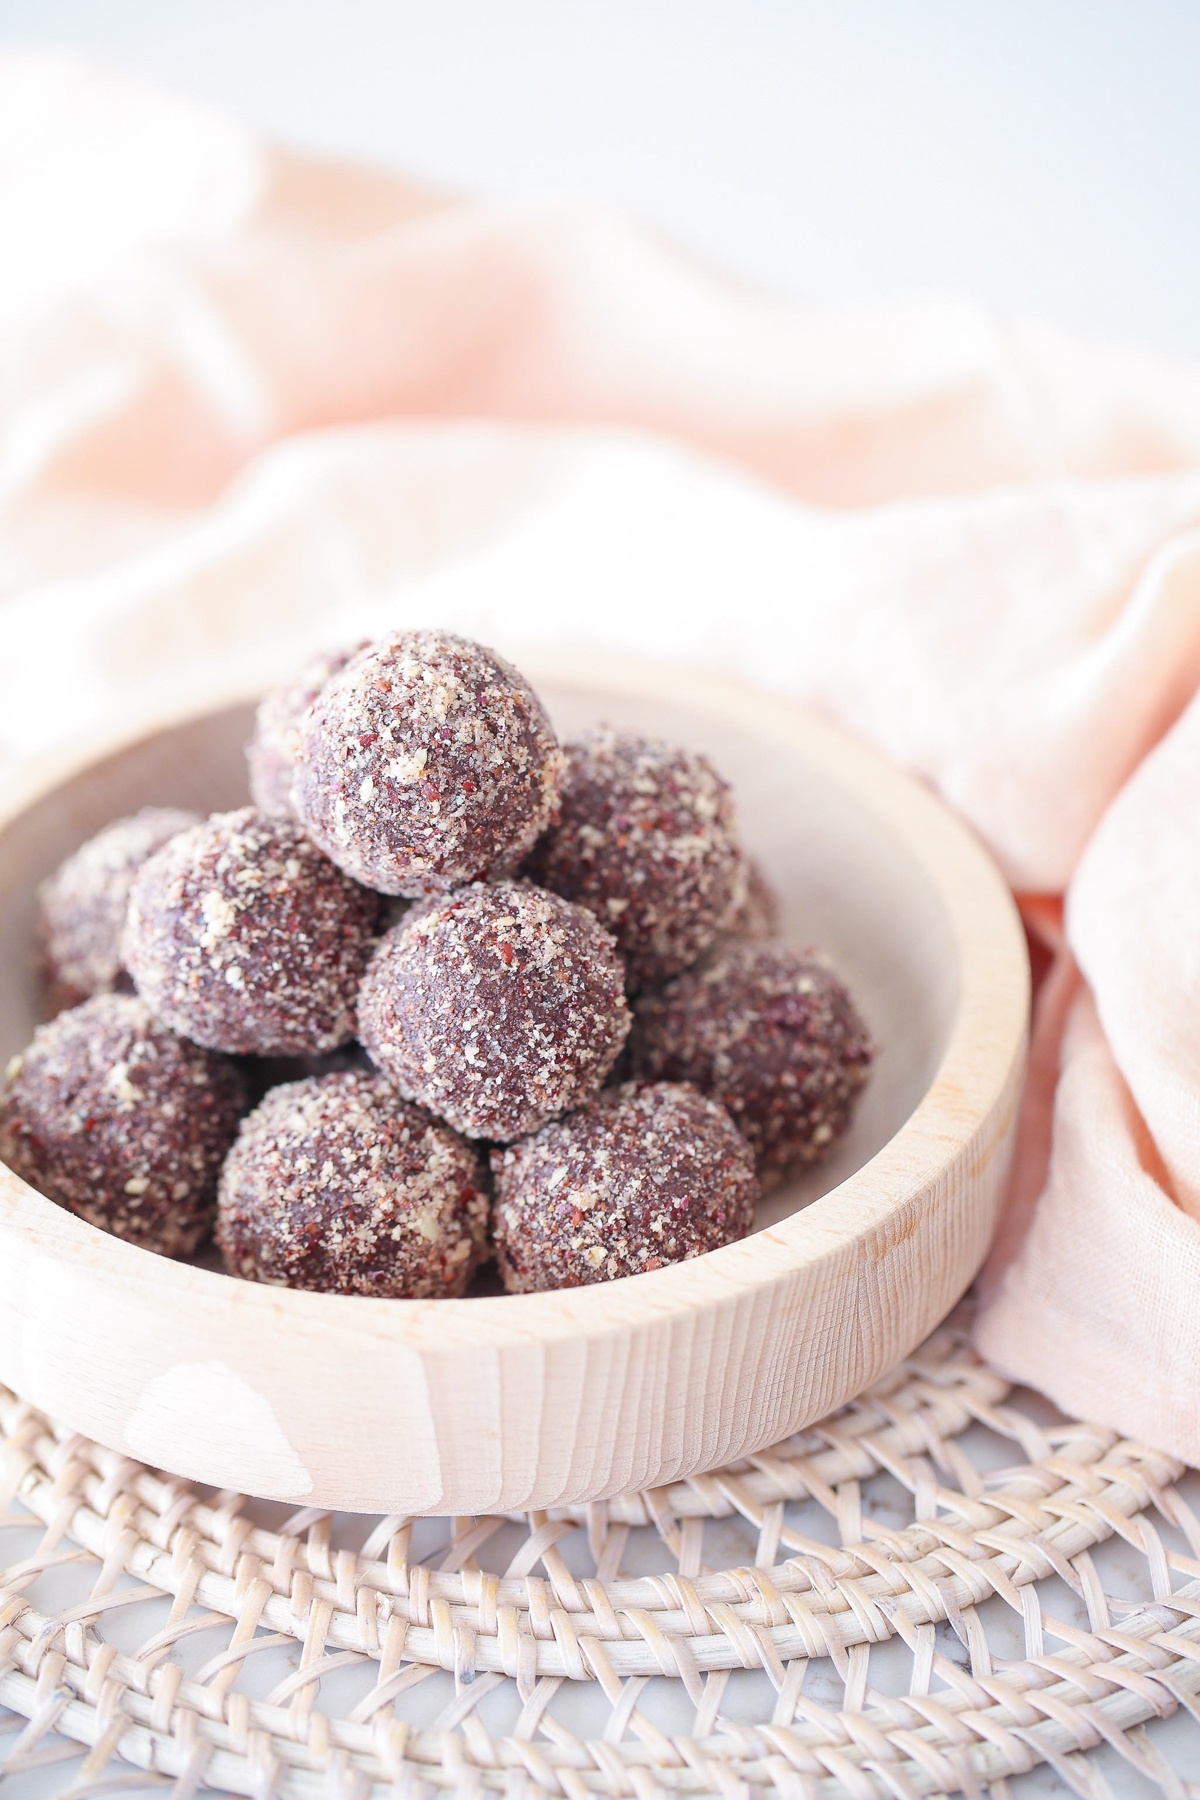
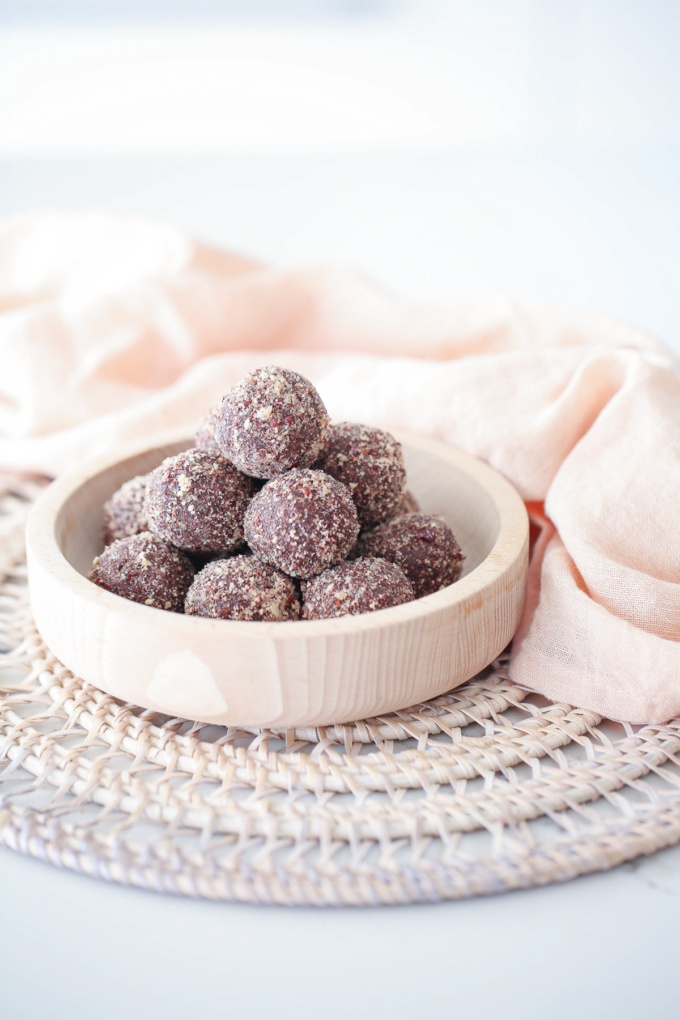
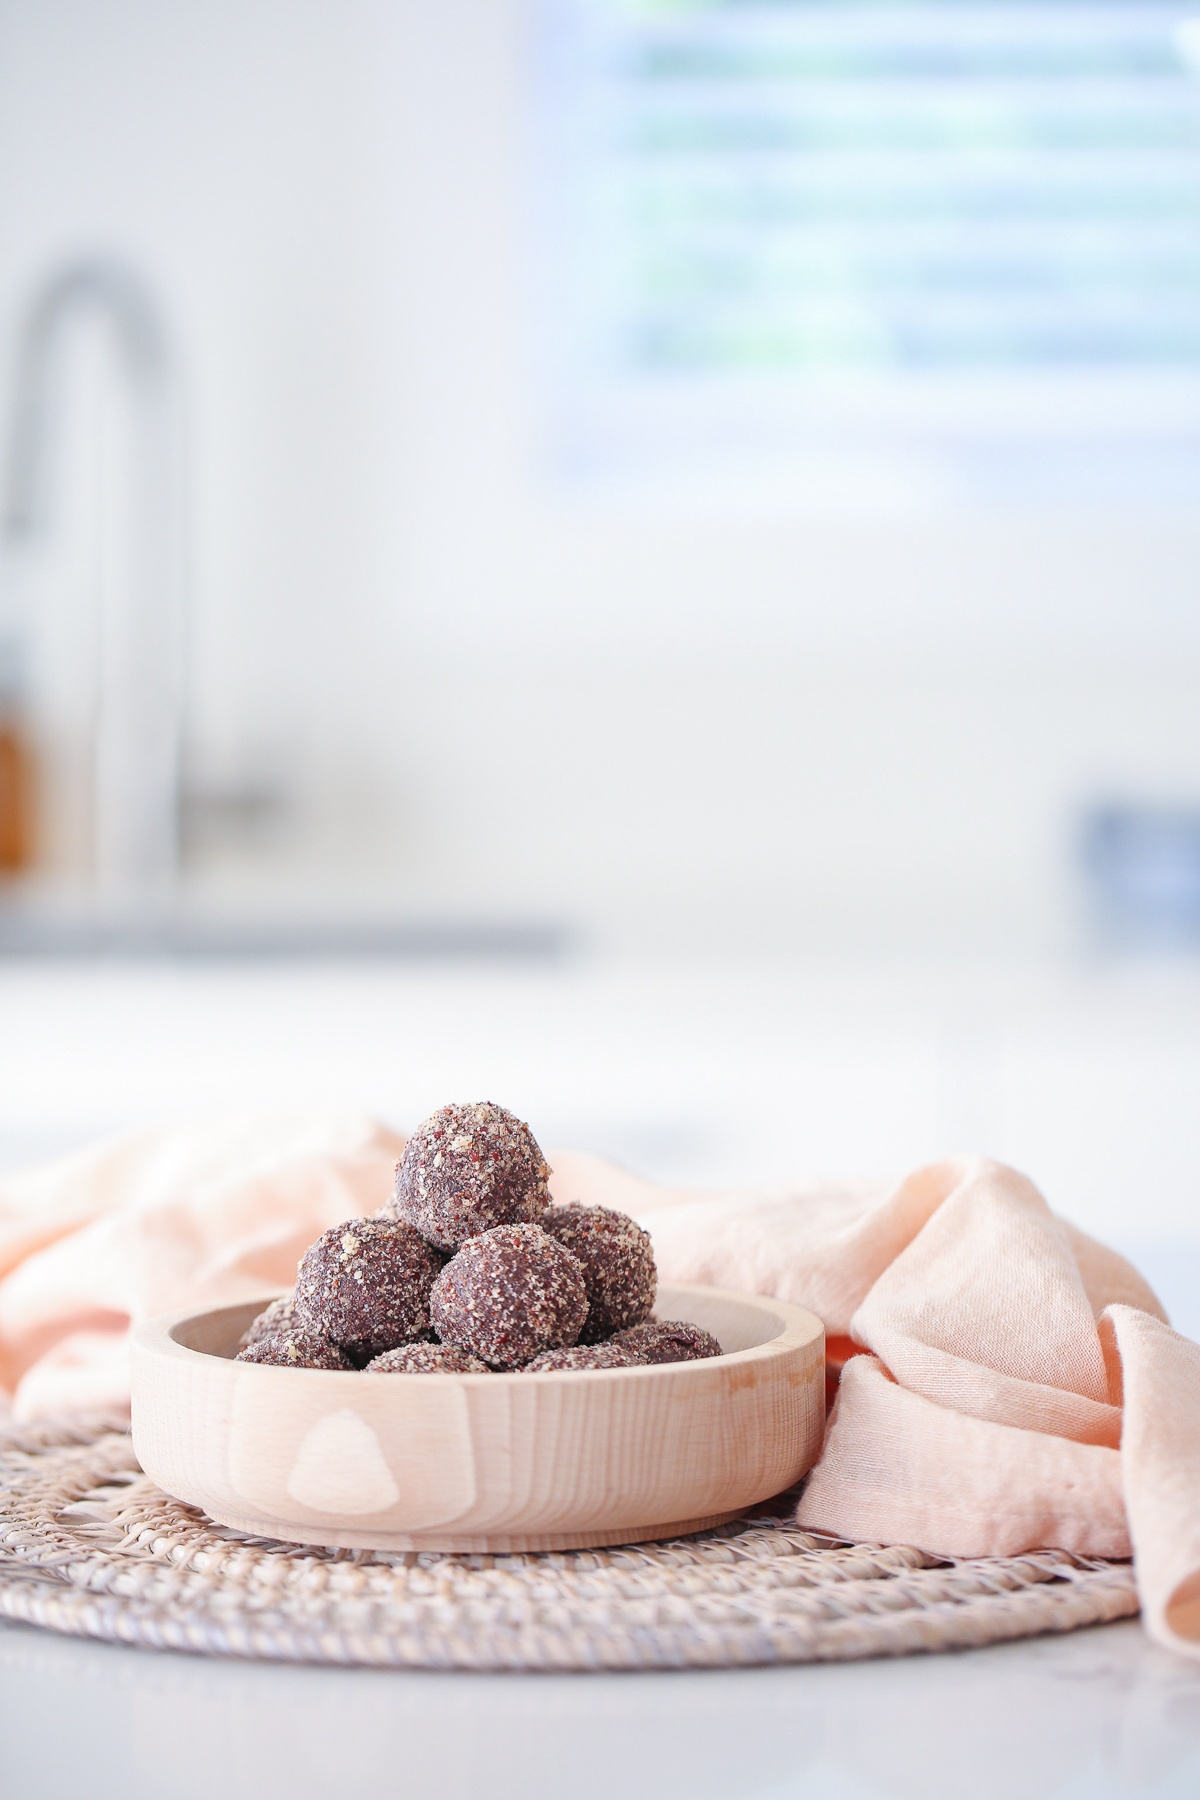
Let’s talk truffles! Ferrero Rocher Truffles.
How to make these Ferrero Rocher Truffles
These beauties have been a favourite of mine for a while now. They are a legitimate 10/10 on the flavour scale, and chew-factor too. Plus, they’re made in 15 mins – what’s not to love. They’re the perfect thing to have in the freezer for when friends pop round (or for your after dinner sweet hit).
Also, as we move into holiday season, below I’ve collated 13 of my top tips for eating healthily whilst travelling. These are little techniques I’ve gathered over the years, and are also what I recommend to my clients.
And guess what – they don’t just apply to travel. They’re equally good if you’re stay-cationing at home too.

How to eat like a plant-based queen (or king) when travelling
1. Pack homemade treats, like these Ferrero Rocher Truffles
- This is especially great if you’re on a road trip, or a flight with no meal. But even when your flight does have a meal, I’ll often take a few snacks with us, to tide us over in the wait lounge so we’re not ravenous when the plane-meal eventually arrives (and tempted to ask for extra bread rolls).
- Of course, homemade treats won’t generally be able to be taken off the flight given agricultural safety regulations, so this hack is for your pre/during travel.
2. Bring snacks with you
- When we went to Samoa earlier this year, we’d been told that healthy snacks (even fruit, surprisingly), was pretty much non-existent. So we packed a bunch of dehydrated nuts in our luggage, as well as our own bags of herbal tea, cacao mixes for drinks, and healthy sweeteners.
- This can also save you a tonne of money and time, rather than traipsing around your arrival location for the healthy things you actually want to eat.
3. Hit the markets
- As soon as I get to a location, I’ll ask about their local markets. Not only is this an awesome place to buy up fresh fruit, we’ll also often buy some easy salad vege like tomatoes, cucumbers, and avo, plus some freshly baked rolls, to self-cater some of our lunches while we’re there.
- Take a container of salt and pepper with you from home, to add pizazz to your sammies! Cost-saving, and delicious, plus a chance to buy a few of their local delicacies too (papaya, watermelon, pineapple, and passionfruit were on heavy rotation for us in Costa Rica).
4. Take a soft chilly bag, sharp knife, reusable containers, and thermos with you
- The thermos can double for both hot or cold water, brilliant when you’re out in some windy wildlife park in the late arvo, and all you really want is a hot tea. When we were in Canada, our hot thermos each day was GOLD. Just fill it with boiling water in the morning from the breakfast bar, your room, or ask reception to do it for you. The chilly bag meanwhile can house your flight/travel snacks, as well as your home-made lunches while you’re there, and any leftovers you pick up from overly large meals (hello USA!).
- Reusable containers and bottles means you won’t be adding to the plastic problem in many of these countries that don’t have efficient recycling systems and just reduce your waste contribution in general. Remember – reduce, reuse, recycle – in that order! Costa Rica actually had an incredible campaign to reduce plastic bottle consumption, as well as plastic straws (they had straws made of avocado stones, how cool is that!).
- The knife you’ll use for slicing your toms and cucumbers to pack into those aforementioned lunch rolls (and hacking into that pineapple). PS – say no to plastic straws at restaurants, before they bring you your drink.
5. For short haul flights, take your own meals
- For short flights eg less than 4 hours, I’ll often now buy the seat-only option, and take our own meals. You save a tonne of money, get to eat something delicious, and aren’t stumped if all they have is meat on board (will you have the chicken, or beef ma’am?).
- Plus – the difference in price between the seat-only, and seat+meal, does not the cost of a lunch make! Take some pre-loaded Netflix vids on your iPad/laptop, or some downloaded podcasts on your phone, if this means you don’t get in-flight entertainment too.
6. Or, request a vegan meal
- Pretty much every airline now offers vegan meals! And guess what – they’re actually pretty good! I’ve been requesting vegan meals for 6 years now, and am often amazed at the quality. This latest flight from Costa Rica, we had sautéed potatoes, spinach, cherry tomatoes, and white beans in a tom sauce for breakfast, alongside a bowl of fruit and soy milk. For dinner – brown rice, grilled aubergine and zucchini, with chickpeas, plus a vegan banana muffin and fruit for dessert. Nice work Air New Zealand.
- Added bonus – you get your meal first!!
7. Plan for three healthy meals
- Don’t skip meals. Plan to eat a healthy breakfast, lunch, and dinner, with some snacks like fresh fruit/nuts with you if you need. Skipping breakfast or lunch, is likely to just lead to you overindulging on dinner instead. Plus – 2 meals meals equals only 2/3rd of the foodie enjoyment!
8. Make your own breakfast, or cycle the buffet
- Book hotels/accommodations that include breakfast. And email them in advance to make sure they’ve got vegan (or at least vegetarian) options available. Most places these days are more than happy to accommodate (and good on us to show them that yes – plant-based vegan foods is quickly becoming the norm!).
- Or, if it’s a B&B, cycle through the buffet each morn. That doesn’t mean you have the pancake, and the muesli and fruit, and the toast with spreads, and the rice and beans every morning. Pick one that takes your fancy each morning, and leave your accommodation for your first sightseeing activity without feeling like a bloated rhino.
9. Figure out early on what the local ‘health’ food is
- Guaranteed, every country I’ve been to, has some sort of local health food. It might not be on the top of the menu, but it’s there! In Costa, we quickly discovered they make the most delicious “Veggie Casado”, or vegetarian plate. Rice, black beans, salad, sautéed vege, grilled plantain bananas, and often avo as well. Seriously – these meals were the shiznit. And often a fraction of the cost of the meat based ‘tourist-orientated’ alternatives!
- When they weren’t on the menu? We asked for them anyway, and the owners immediately knew what we were looking for.
10. Think veges first
- Whatever you do order, think “veges first”. That means – where are my vege coming from – salad, sautéed veges etc, and then filling the rest of your plate. You can easily achieve this by ordering a big side salad, and sharing a more dense carb/protein/fat containing main. A good guide is to think of the plate model – ½ veges, ¼ protein dense food, ¼ carbohydrate dense food, and a dash of fats.
- If you prefer a low carb style diet, then you can always reduce/drop the carb portion, and double your fats. Some people’s bodies, including my own, operate well generating energy off of a good dose of fats. Tony meanwhile, is more a carb kinda guy, so to reduce his rice portion and add extra avo would be sacrilege (one hangry partner would I have).
11. Order off the menu
- Our off-the-menu veggie Casado above? That’s not the only way you can get order-placingly-creative. Ask the waiter to drop the fries and add extra salad, or if you’re at a pizza place, request less cheese more vege. Yes they’ll look at you a little strange, but they’ll happily comply.
12. Search the internet for the top vegan restaurants in your area
- Either before or during your trip, do a quick google search of the “Top Vegan Restaurants in…” your location. It’ll also bring up the reviews, so you can quickly pick yourself a nearby delicious restaurant, that serves veggie options, but also tastes good.
- I didn’t do any restaurant pre-planning on this trip, but it only took about a minute before each dinner (and we didn’t do it every time, thank you veggie Casado), to find ourselves a sweet spot. Vegan burgers, vegan Italian, a 100% gluten free B&B – we found it all! Trip advisor is a good site to look at too, but to be honest these days I just hit google.
13. Take a multi-vitamin with you
- Just to be sure, take your favourite plant-based multi-vitamin with you. Just in case you don’t get the full spectrum of nutrients you need, this will help you fill any gaps. If you’re needing advice on specific plant-based supplements I’d recommend, send me an email here and I can point you in the right direction! For both adults and kids alike.
Contrary to what most people think, it’s possible to travel, and not put on weight due to over-indulgence. I eat the most delicious foods, with my fair share of cakes and ice creams to boot, and somehow seem to always lose weight on holiday! Not for trying. But the reduced stress, eating healthy balanced well-timed meals (e.g. not lunch at 4pm, whoops – overdue blog post), and lots of walking through nature parks, beaches, and cities; seems to drop the weight every time.
Give my tips above a go, and let me know how you get on. And of course, make a batch of these healthy Ferrero Rocher Truffles for the ride. If you do, share them with me (along with your travel plans) over on Instagram! Tag me in with @begoodorganics, so I can see how you get on.
Til next time, stay happy and well.

Ingredients
- 16 hazelnuts
Truffles
- ½ c hazelnuts
- ½ c rolled oats
- ¼ c cashews
- 1 c dates
- ¼ c sultanas
- ¼ c cacao powder
- 1 tsp vanilla extract
- pinch sea salt
- 1 tbsp coconut oil melted
Topping
- ½ c hazelnuts
- ¼ c cacao nibs
Instructions
- To roast your hazelnuts, place them on an oven tray and roast on fan bake at 180°C (355°F) for 7 minutes. Remove and let cool, then pour into a clean tea towel, close it into a bundle and rub them together so some of the skins flake off. Pour the nuts into a sieve/colander and shake them again so the skins fall to the bottom (it's ok if some of the skins are still on).
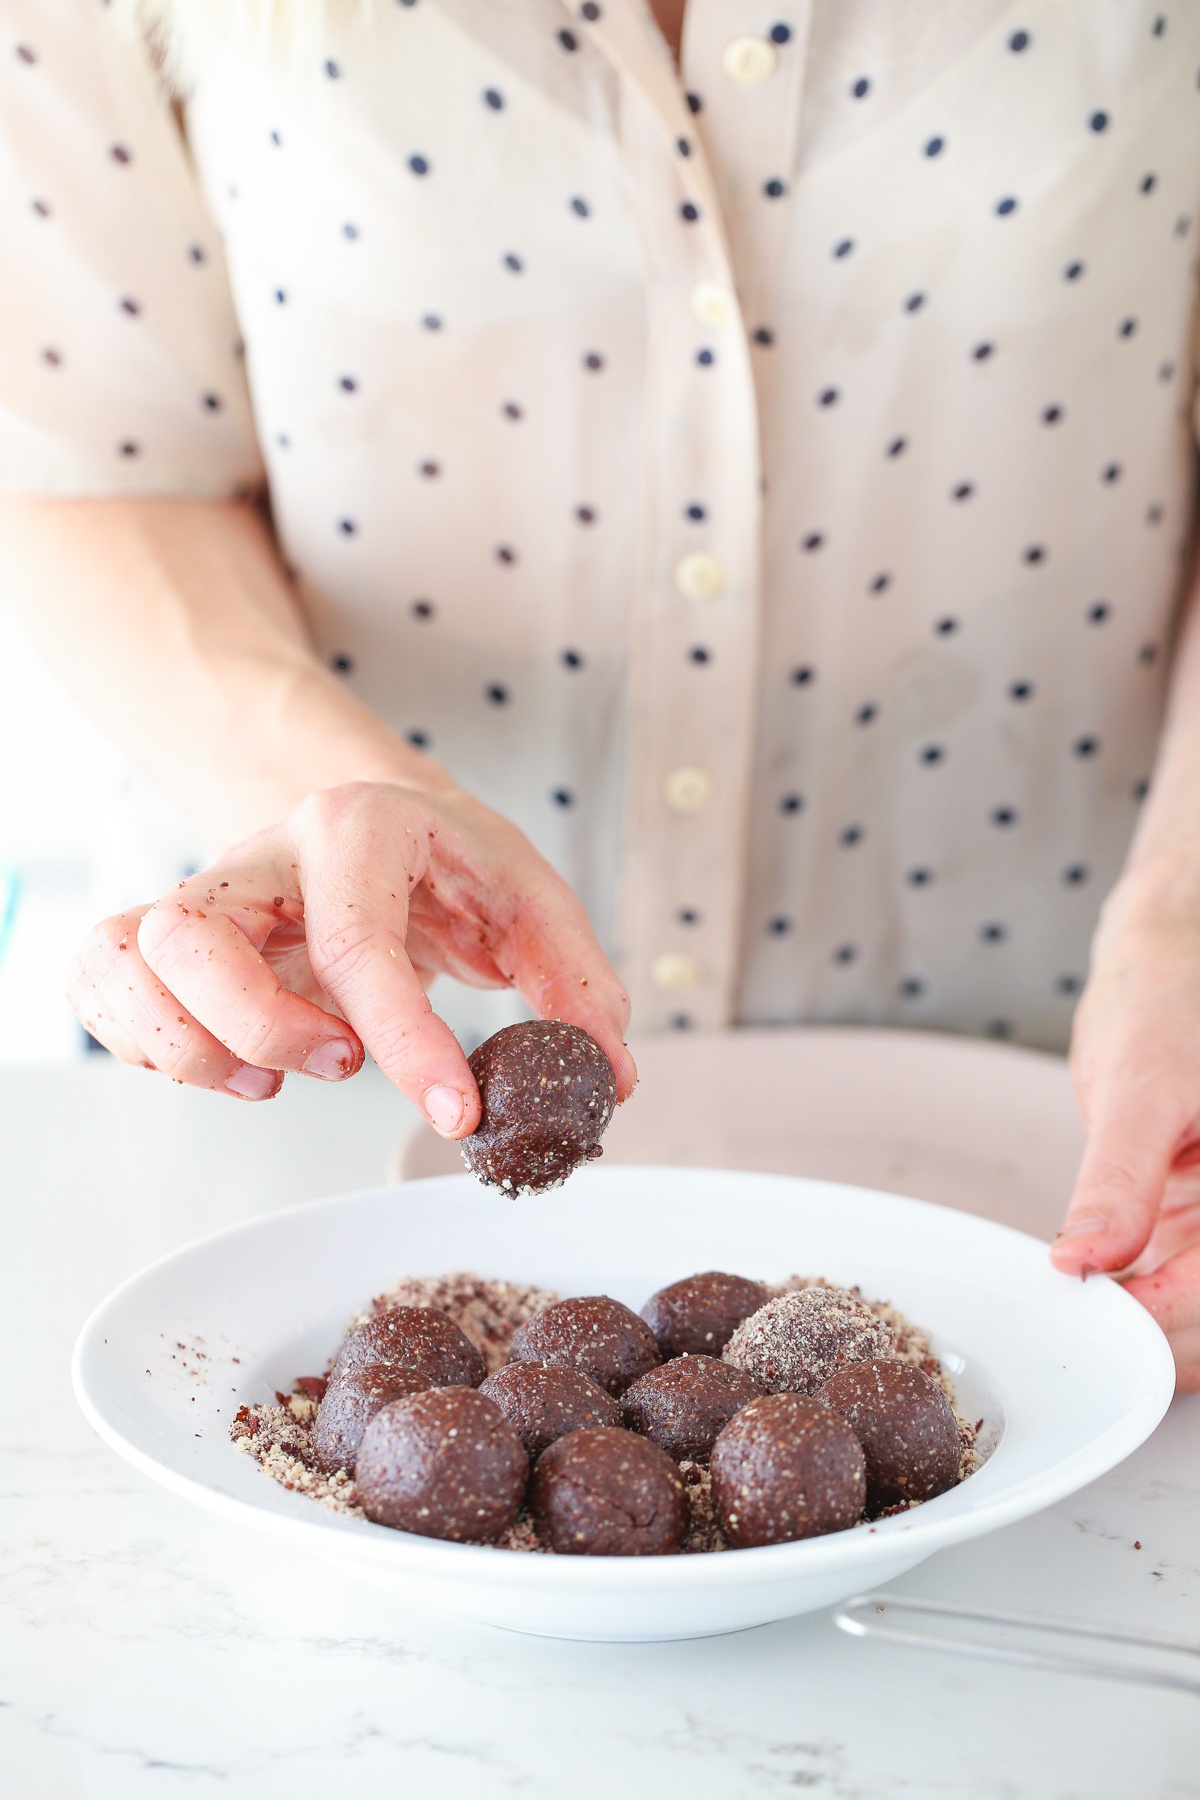
- Put the topping ingredients in a food processor and blend until finely chopped, then pour into a flat bowl.
- Place the remaining truffles ingredients in your food processor and blend until the oils from the nuts release and it starts to form a sticky dough. It should hold together when pressed between your finger. If it doesn't, add another tablespoon of melted coconut oil or water.
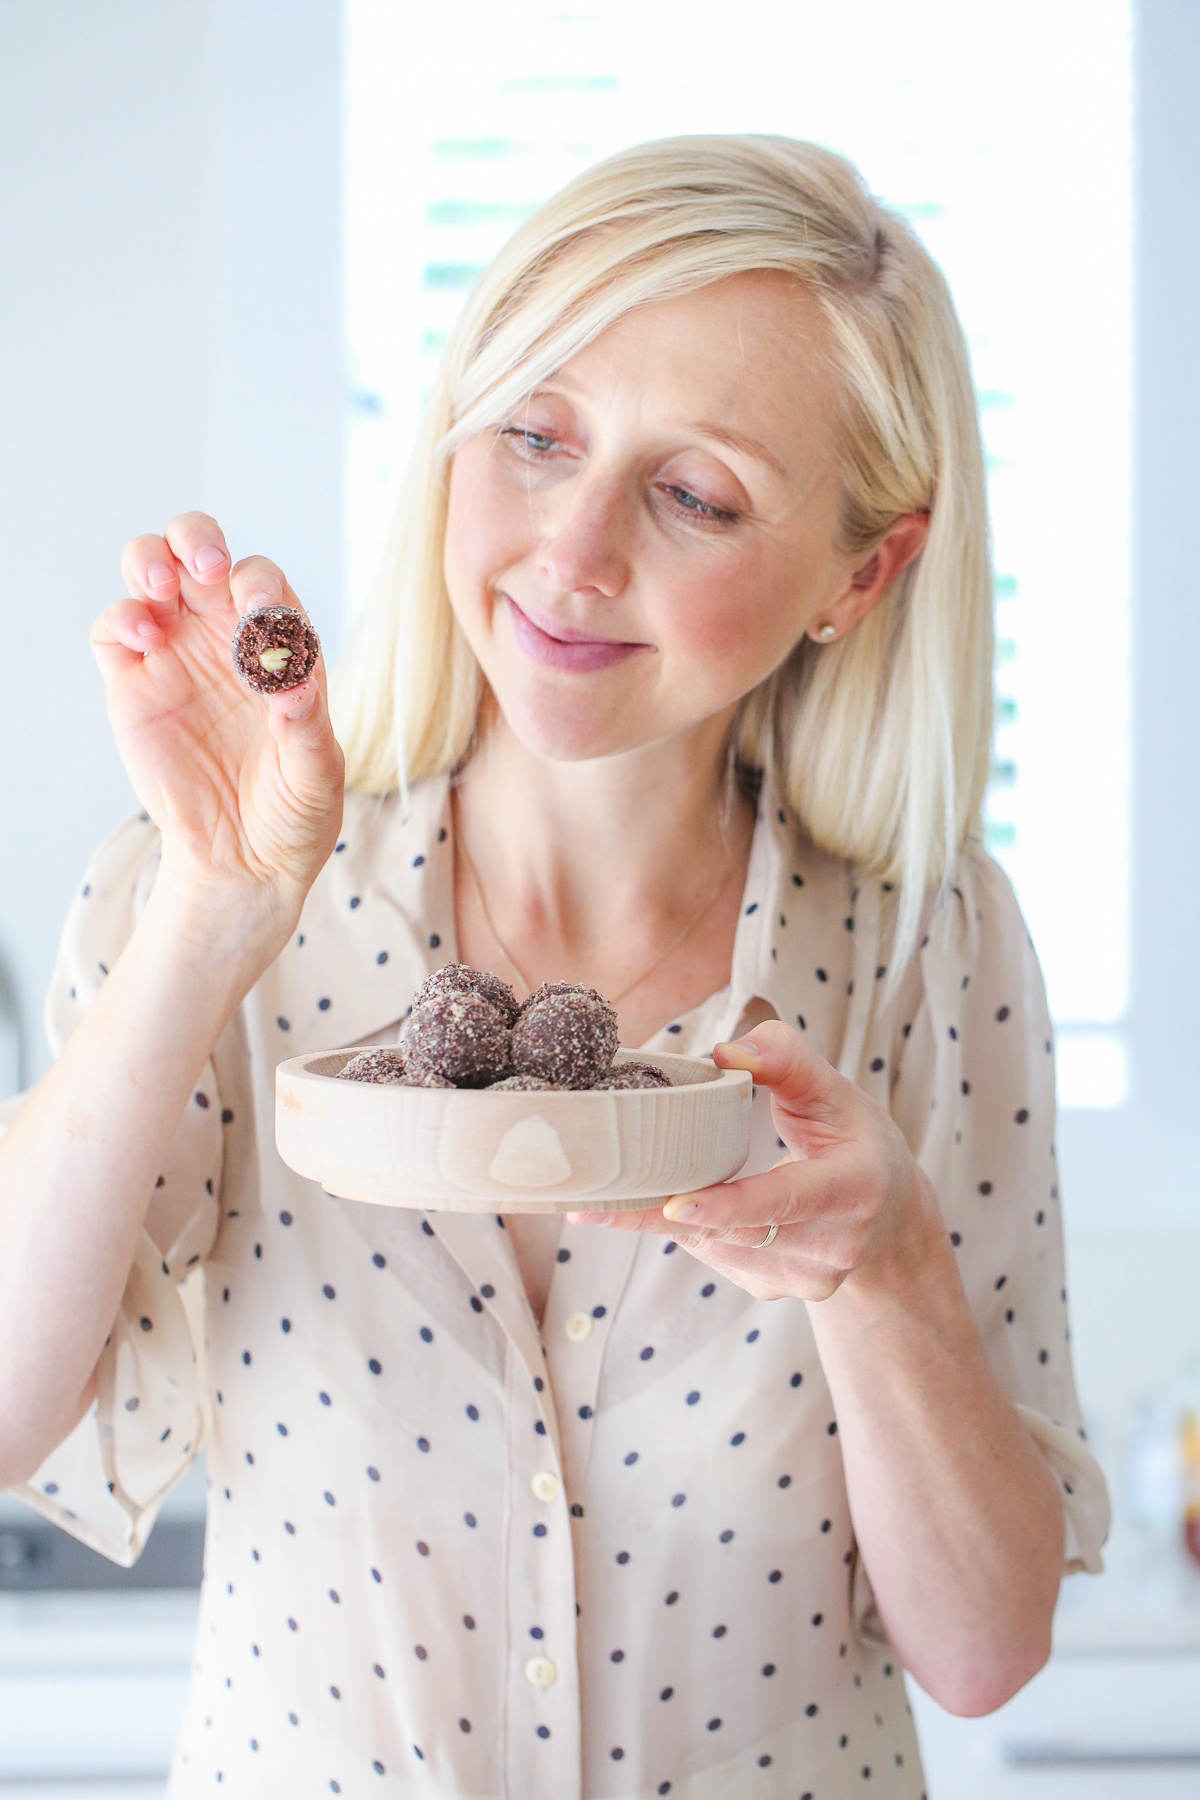
- Scoop out tablespoons of the mixture, place a hazelnut in the middle of each and roll into balls with your hands, then roll into your flat bowl of toppings. Place in the freezer for an hour to set, then keep in the freezer for optimal chew. Will keep in the freezer for 2 months.
Equipment
- Food processor
Recipe Notes
- Gluten free: these are naturally wheat free through the use of rolled oats. To make them completely gluten free (and paleo) if you are Coeliac or avenin/oat intolerant, swap the oats for extra hazelnuts, cashews, or buckwheat groats.
- Nut free: use hemp seeds instead of hazelnuts and cashews. However, this will change the flavour profile somewhat.
- If you are allergic to coconuts, melted cacao butter can be used as a substitute – it gives them an even richer chocolate flavour.
- You can also use activated hazelnuts instead of roasting – just don’t use raw.
- If your food processor is not that strong, blend the nuts and oats first until they form a powder. Then add your dates one by one whilst the motor is running through the hole in the top, and finally the remaining ingredients at the end and blend until sticky and combined. If your mixture is still a bit crumbly, add another tablespoon of coconut oil (or water) to the mix and blend again.
- The movement and heat from blending will encourage the nuts to release their natural oils, especially if you use the lightly roasted version. As a result, the roasted version will blend together quicker than the dried and activated version as the oils more readily release (especially if the nuts are still a little warm, which will help them to blend).
- Keep any leftover hazelnut cacao nib topping mixture in a sealed container in the fridge, and sprinkle on your muesli, fruit or dessert with some coconut yoghurt.